Factions & Formations
Heroes and Bonuses by Faction
Tribe / Legion / Ranger
| Faction | Front row Tank | Back row Damage · Support |
|---|
| Tribe |  Ragnar  Sanada Yukimura |  Joan of Arc 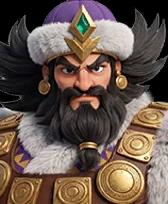 Attila  Charles Martel(Support) |
| Legion |  Harald III 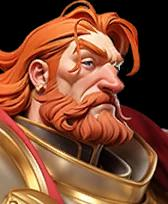 Frederick I |  Boudica 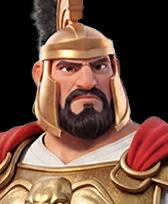 Hannibal Barca  Mulan |
| Ranger |  Alexander Nevsky 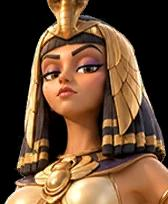 Cleopatra |  Yi Sun-sin 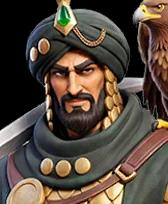 Saladin  Edward |
Faction Bonus
3 of the same faction: HP · Attack · Defense +5%
3 of the same faction + 2 of another: +10%
4 of the same faction: +15%
5 of the same faction: +20%
The Lord counts as any faction to complete the formation bonus.
Skills With Faction Conditions
Frederick I Skill 3: effect doubled when a Legion hero is countering
Cleopatra Skill 2: at high star levels, extra Tactical protection for Ranger heroes
Note
The faction bonus is said to unlock after the first Capital Siege. Check the actual values on the formation screen.
Forcing in a hero who is far behind just for the bonus can actually make you weaker.
Faction Matchups
Take 20% less damage from that faction
| Faction | Faction you take less damage from | Summary |
|---|
| Tribe | Legion | Holds up well against Legion |
| Legion | Ranger | Holds up well against Ranger |
| Ranger | Tribe | Holds up well against Tribe |
- This is not a 20% bonus damage effect on the opponent. It reduces the damage you take from that faction by 20%.
- Pick your front row faction based on the enemy’s main faction to reduce damage.
Front Row / Back Row: Why Place Them This Way
2 front row slots + 3 back row slots, each with a reason
How to read the diagram
The top is the front row (the side facing the enemy) and the bottom is the back row. Left and right are from your point of view on the squad formation screen.
Who goes where, and why
| Slot | Role | Why here | Tribe example |
|---|
| ① Front row, left | Main Tank | The enemy’s normal attacks hit this slot first. Put your sturdiest, highest star level Tank here. | Ragnar |
| ② Front row, right | Sub Tank | Takes the attacks after ① falls. Put your second sturdiest Tank here. | Sanada Yukimura |
| ③ Back row, left | Durable Damage | This slot is attacked after the two Tanks. Put the sturdier of your Damage heroes here, or the Lord. | Attila or Lord |
| ④ Back row, center | Main Damage | This slot is attacked last, so it survives longest and deals damage the longest. Put your Damage hero with the best star level and gear here. | Joan of Arc |
| ⑤ Back row, right | Support · Spare Damage | The leftover slot. Martel’s attack buff applies to all 5 allies regardless of position, so he goes here. | Charles Martel |
The guide says the enemy’s normal attacks go in the order ① → ② → ③·⑤ → ④. This matches the user opinion to put your strongest Damage hero in the ④ center.
Why put Tanks in the 2 front slots
The damage reduction and counter skills of Ragnar, Cleopatra, and Frederick I apply to the “2 front row allies.” The Tank must be in the front row to receive those effects.
Sanada Yukimura’s Defense boost also applies only to the 2 front row allies at low star levels.
Putting a Tank in the back row just because of high power is a loss.
Why put Damage and Support in the 3 back-row slots
Damage heroes must deal damage while the front row holds, so they go in back.
Charles Martel is a Support hero, so he goes in the back row. Players report he went down fast when placed in front.
Things to watch
The attack order above is for normal attacks. Skills target other slots. Mulan and Saladin go for the back row, and Hannibal’s Skill 1 hits the enemy with the lowest HP percentage first. If the enemy has such heroes, Cleopatra’s Skill 2, which protects 5 allies, is useful.
There are also reports that left and right can be flipped when defending, so check your battle reports.
The game has no official explanation of slot position effects. The surest way is to change only the placement in the Arena, fight twice, and compare the battle stats.
Complete formations by faction
Front row 2 Tanks / Back row 3 Damage and Support
Tribe
Recommended faction for free and low spenders. It is the only faction with a Support hero (Martel).
Ranger
Counter advantage: 20% less damage taken from Tribe. Players say it gets much stronger once Cleopatra (around Day 64) arrives.
Legion
Frederick I (around Day 85) and Boudica (around Day 92) arrive late, so this is the slowest to complete.
Squad 1, 2, 3 setup
Focus on Squad 1, then use leftover heroes for Squads 2 and 3
Squad 1: 5 heroes of your main faction
Fill all 5 slots with your strongest faction (+20%). Squad 1 gets materials and gear first.
Mixing in Damage heroes from other factions reduces the faction bonus. In particular, Legion Damage deals 20% less damage to Tribe (counter), which hurts on servers with many Tribe players.
Squad 2: second faction + Lord
Build it with the Lord moved out of Squad 1 and URs from other factions (Yi Sun-sin, Nevsky, etc.).
3 from the same faction + 2 from another gives +10%, and the Lord counts as any faction.
If Squad 1 is Tribe, Ranger is often used for Squad 2.
Squad 3: leftover factions and SSRs
Fill it with Legion heroes or SSRs (Bjorn, Blossom, etc.). Mainly used for gathering and monsters.
SSRs get replaced once you get a UR, so do not invest much in them.
Always set a defense squad
Many players report their soldiers died right away when attacked without a defense squad.
For defense, heroes that reduce damage, like Cleopatra, Ragnar, and Frederick I, are good.
Swap by situation
Monsters/Bosses: Charles Martel (ATK buff) + Edward (DEF reduction) + a sturdy front row
Attacking enemy squads: Damage heroes that hit the back row, like Mulan and Saladin
Defense (garrison): Cleopatra, Ragnar
Vanguard: single-target Damage for one boss, AoE Damage for several
Squad 1 changes by server day
Depends on when faction bonuses unlock
Days 1-28: UR count comes first
There is no faction bonus yet, so fill UR hero count before faction.
Example: Lord, Ragnar, Joan of Arc + Yi Sun-sin, Nevsky
Days 29-56: basic Tribe formation
Once faction bonuses unlock after the first Capital Siege, match the same faction.
The basic setup is front row ① Ragnar ② Sanada, back row ③ Lord ④ Joan of Arc (center) ⑤ Martel.
Day 57+: 5 Tribe heroes without the Lord
Once Attila reaches 4 stars, put Attila in the ③ Lord slot to complete 5 Tribe heroes.
When to drop the Lord
Many players say even a 5-star Lord is about as strong as a 3-4 star UR hero.
From Charles Martel at 4 stars / as soon as Attila hits 4 stars / Yi Sun-sin at 4 stars (at 3 stars, Martel is better)
You can keep using the dropped Lord in Squad 2.
Order to raise to 4 stars (Tribe)
Joan of Arc 4 stars → Sanada and Martel 4 stars → Attila 4 stars (swap with Lord) → Ragnar 4 stars → 5 stars starting with Joan of Arc
Ragnar’s own shards keep dropping from Recruitment, so you can put him off.
3 main formations
Starter example: 2 front row / 3 back row
| Faction | 2 front row | 3 back row | Playstyle |
|---|
| Tribe | Ragnar Sanada Yukimura | Joan of Arc Attila Charles Martel | 2 Tanks + 2 Damage + 1 Support |
| Legion | Harald III Frederick I | Boudica Hannibal Barca Mulan | Defense and counterattack + back-row pressure |
| Ranger | Cleopatra Alexander Nevsky | Yi Sun-sin Edward Saladin | Defense buffs + single-target and back-row firepower |
What to check first by battle goal
Bosses/Monsters: ATK buffs, single-target damage, staying alive. Compare total damage on the same boss
PvP attack: back-row pressure, AoE damage, keeping the front line. Check the enemy faction and damage type
Base defense: damage reduction for all/front line, counterattack, healing capacity. Analyze troop losses and reports
Specific stages: separate AoE and single targets, then add survivability. Swap heroes one at a time to compare
If you lack URs, build a temporary team with SSRs
You can fill the front row with Tribe’s Bjorn and William (Tanks), Ranger’s Wade (Tank), Legion’s Leonidas (Tank), and so on.
If you have a well-raised SSR, do not swap it for a low-star UR right away.
Note
Do not break the 2 front / 3 back roles just to match 5 heroes of the same faction.
Roles of the 15 heroes and why to raise them
Base UR / 5 per faction
| Hero | Faction | Role | Why raise |
|---|
| Ragnar | Tribe | Tank | When your front line lacks survivability |
| Sanada Yukimura | Tribe | Tank | Tribe 2-Tank formation |
| Charles Martel | Tribe | Support | Supports bosses and main Damage heroes |
| Joan of Arc | Tribe | Damage | Sustained firepower |
| Attila | Tribe | Damage | AoE firepower |
| Harald III | Legion | Tank | Front-line control |
| Boudica | Legion | Damage | AoE damage |
| Hannibal Barca | Legion | Damage | Finishing firepower |
| Mulan | Legion | Damage | PvP back-row pressure |
| Frederick I | Legion | Tank | Base defense and front line |
| Yi Sun-sin | Ranger | Damage | Ranger firepower |
| Saladin | Ranger | Damage | PvP back-row sniping |
| Alexander Nevsky | Ranger | Tank | Against Martial damage-focused enemies |
| Edward | Ranger | Damage | Bosses and single targets |
| Cleopatra | Ranger | Tank | Defense and front line |
- Recommendations are based on skill roles and vary with star level and the heroes you own.
- Skill 1 unlocks at hero Lv.1, Skill 2 at Lv.5, and Skill 3 at Lv.21.